
Before you start
An email inbox you can open. You will confirm that address before using your workspace.
A unique password or passphrase of at least 12 characters. A password manager is useful.
A public display name and a username. You do not need a payout wallet just to create an account.

Follow along with Mila & SatsGarden, our fictional example account and project. Screens show example data.
Open Create an account
Choose Sign in at the top of the site, then Create an account under the email login form. You can also open the registration page directly. Registration is separate from Lightning sign-in: a Lightning wallet must first be linked to an existing account.
Choose your public name and username
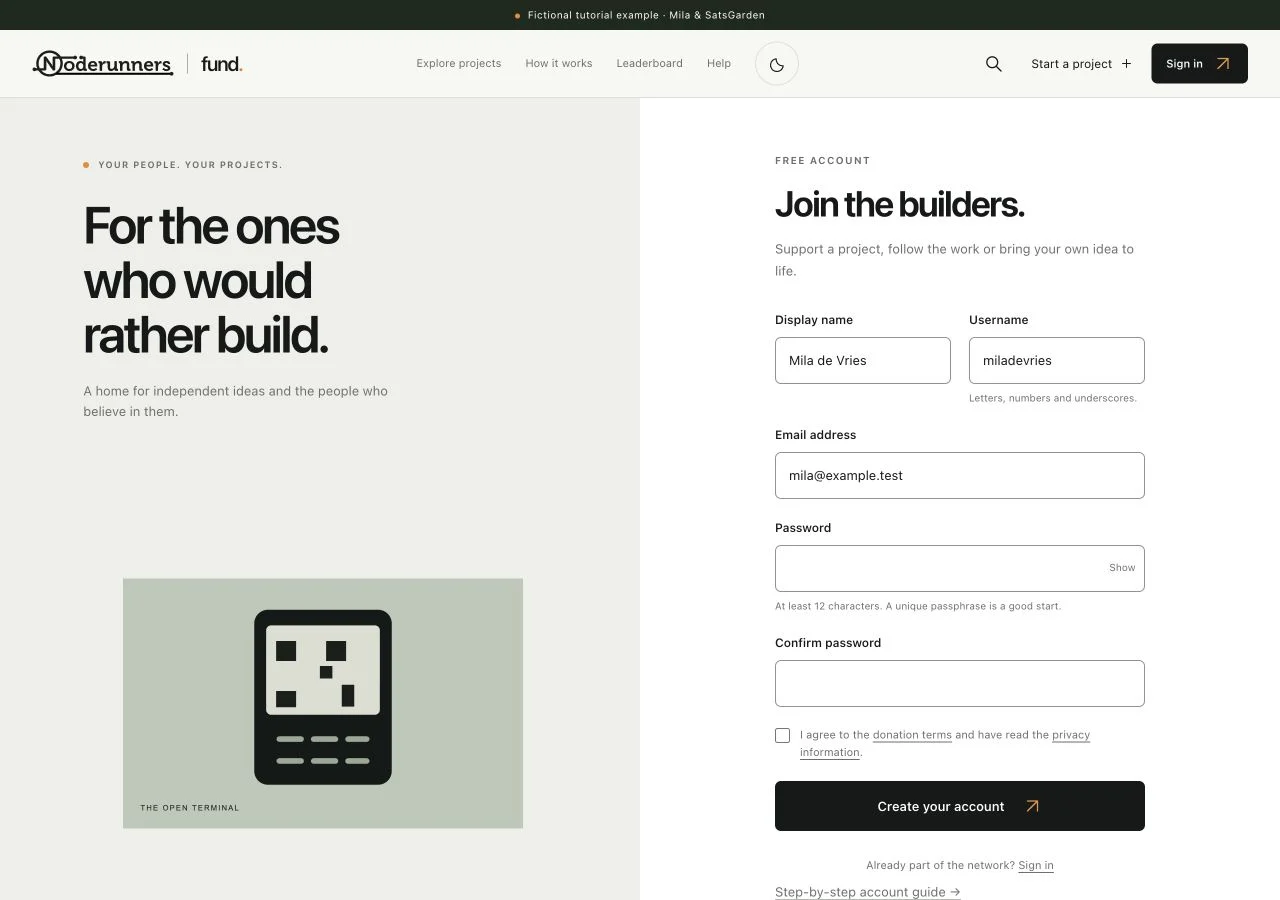
Enter Display name, the name people will see on your profile and projects. Choose a Username using 3–30 letters, numbers or underscores. A username must be available. Mila uses a recognisable maker name; you can use a suitable public name rather than your legal name.
Enter an inbox you control
Fill in Email address and check it carefully, especially the domain after @. Account verification and important account messages go here. Your account email is not published as your profile contact address. Use an address you expect to keep access to.
Set and confirm your password
Enter a unique password in Password, then enter it again in Confirm password. Use at least 12 characters and follow any length or strength feedback shown by the form. Show lets you check the first entry before submitting. Do not reuse a password from another service or use your wallet recovery phrase as a password.
Read the terms and create the account
Open the donation terms and privacy information links if you want to read them first; they open separately so your form stays available. Tick the agreement box when you agree, then choose Create your account. If a field is rejected, correct the message next to it. Your name, username and email stay in the form; enter both password fields again.
Find the verification email
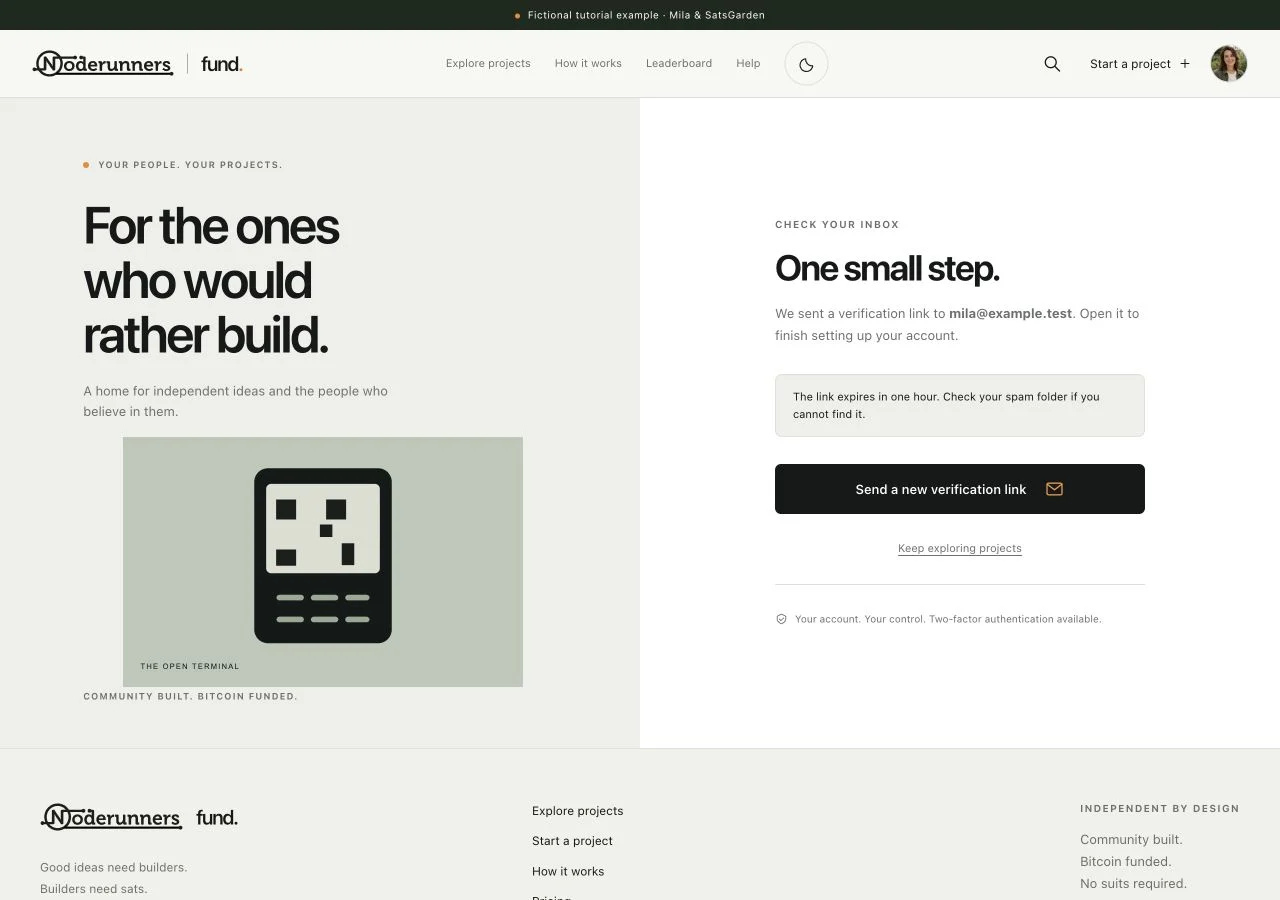
The next page is Check your inbox. Open the mailbox you entered and look for the Noderunners verification message. Mail is processed in the background, so allow a little time and check spam or junk as well. Keep the verification page available until the account is confirmed.
Open Verify email address
In the email, choose Verify email address. The link expires after one hour and can be used once. Opening it confirms control of the inbox; it does not ask for a wallet seed or a payment. If you open it in the browser where you registered, continue to your dashboard. If you are signed out, sign in using the email and password you just chose.
Request a new link if the first one is missing
Go back to Check your inbox and choose Send a new verification link. Use the newest email: requesting a replacement invalidates older verification links, and older unsent messages are removed from the queue. Repeated requests are limited; if you are asked to wait, keep the latest valid message rather than clicking repeatedly.
Explore your first dashboard
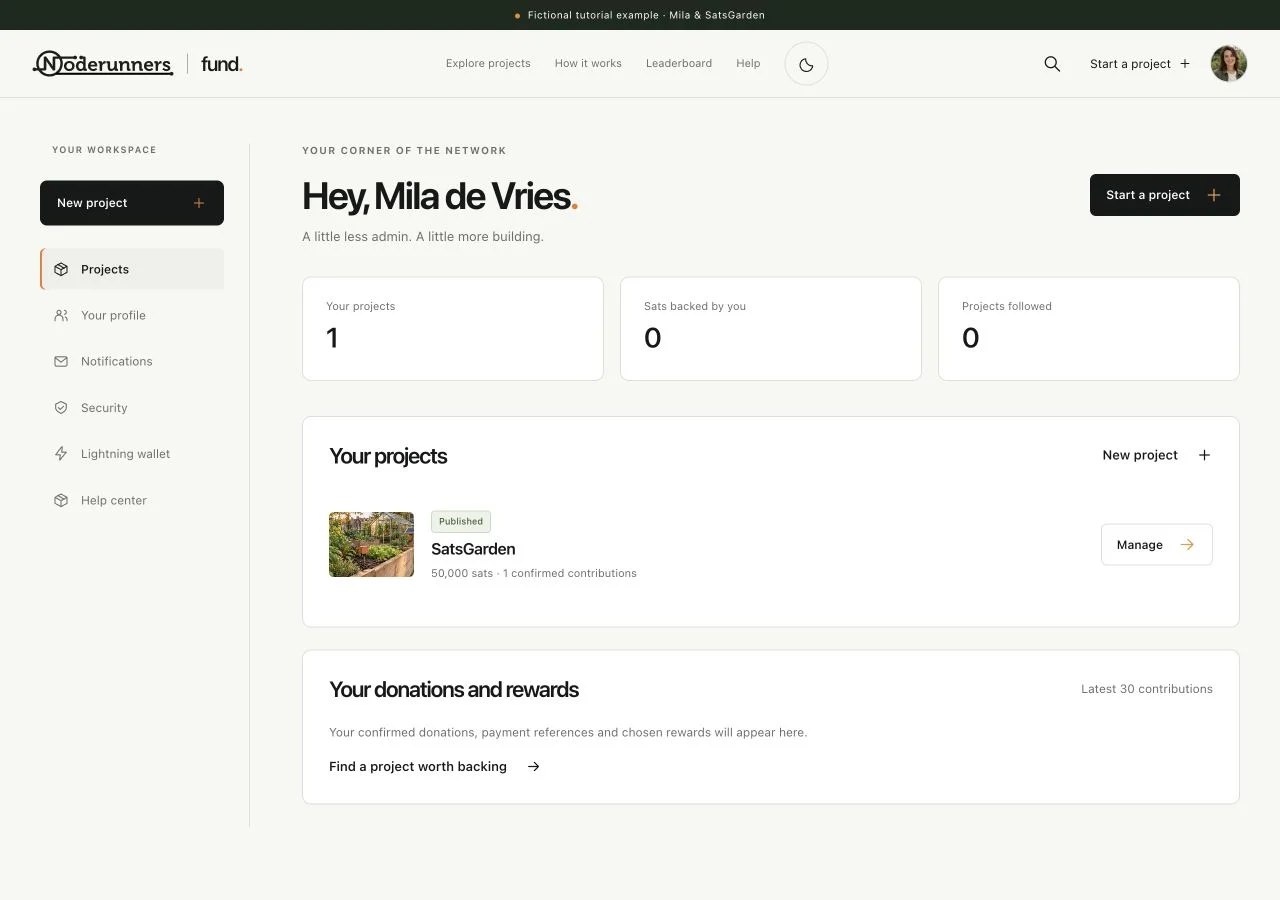
After verification, open Projects from your account menu. This is your workspace for your own projects, followed projects and support history. Your account is ready even when you have not created a project or connected a payout wallet. Two-factor authentication is available in Security, but is not required for every account.
You’re all set when…
You can sign in again using your email and password.
Your email is verified and the workspace opens.